# 手机浏览器录音
今天我们来实现手机浏览器的录音功能,记录用户通过麦克风输入的语音,转存为音频文件,然后进行语言播放、语言聊天或者语言识别等。
# 获取麦克风权限
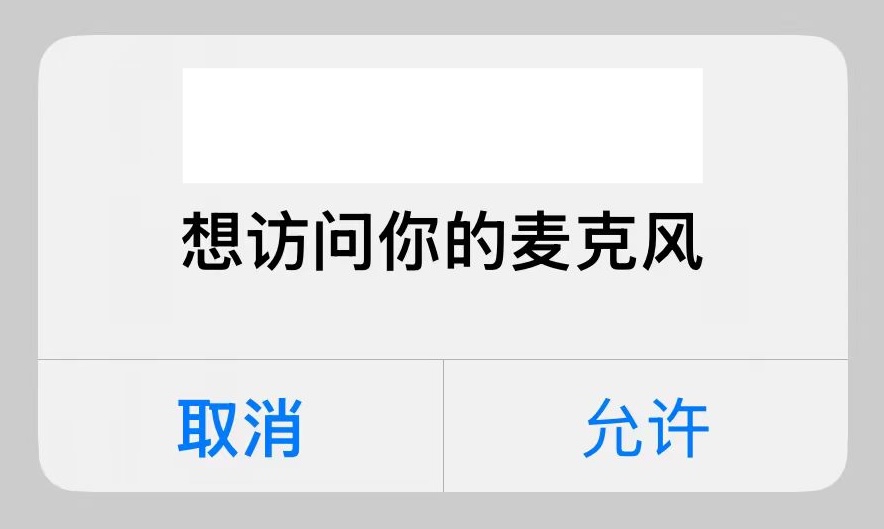
通过 navigator.mediaDevices (opens new window) 属性的 getUserMedia() (opens new window) 方法,请求获取麦克风权限。如果用户同意,将返回一个 MediaStream (opens new window) 对象 resolve promise,如果用户拒绝将返回 NotAllowedError 的 reject promise。
const stream = await navigator.mediaDevices.getUserMedia({
  audio: true,
});
2
3

# 开启 HTTPS
如果你在 HTTP 服务里运行上面的代码,程序将报错,因为在 HTTP 服务里 navigator.mediaDevices 为 undefined。从 MDN 文档得知,MediaDevices (opens new window) 只能用于 HTTPS 服务
[!NOTE]
Secure context: This feature is available only in secure contexts (opens new window) (HTTPS), in some or all supporting browsers (opens new window).
所以我们首先需要开启 HTTPS 服务。我这个 demo 是使用 http-server (opens new window) 开启一个 HTTP 服务,http-server (opens new window) 也可以开启一个 HTTPS 服务 (opens new window),只需要一个 SSL 证书即可。申请 SSL 证书有很多种方法
- 去证书颁发机构申请证书,Let’s Encrypt (opens new window)、ZeroSSL (opens new window) 和 Cloudflare (opens new window) 是免费的证书颁发机构,适用于开发环境和生产环境,但是需要域名
- 使用工具生成本地证书,这样的工具有
mkcert(opens new window)、openssl(opens new window) 和caddy(opens new window)
因为我是本地开启 HTTPS 服务,没有域名,同时需要手机端也正常访问,所以我使用 mkcert 生成 SSL 证书
# mkcert
# 安装
$ brew install mkcert
# 在系统中安装本地证书颁发机构
$ mkcert -install
# 生成证书
$ mkcert -cert-file cert.pem -key-file key.pem 192.168.0.102

# Created a new certificate valid for the following names 📜
#  - "192.168.0.102"
# The certificate is at "cert.pem" and the key at "key.pem" ✅
2
3
4
5
# 手机安装根证书
# 获取 mkcert 的根证书
$ mkcert -CAROOT

# ~/Library/Application Support/mkcert
2
3
该命令会输出一个路径,例如 ~/Library/Application Support/mkcert
在这个路径下,你可以找到根证书文件,通常是 rootCA.pem。
# 将根证书导入到 iPhone
将根证书 rootCA.pem 导入到 iPhone
# 安装证书
在 iPhone 上点击 rootCA.pem 文件,并完成安装步骤。
# 信任根证书
安装证书后,还需要将其标记为信任:
- 打开 iPhone 的 设置
- 进入 通用 > 关于本机 > 证书信任设置
- 找到刚安装的证书,启用对该证书的完全信任
# http-server
生成并安装证书之后就可以开启 HTTPS 服务了
$ http-server -S -C cert.pem

# https://192.168.0.102:8080
2
3
在手机端输入 https://192.168.0.102:8080,就可以访问 HTTPS 服务了
其它开启 http 服务的工具,也是一样的,添加 SSL 证书就可以开启 HTTPS 服务。有些工具甚至带有自动生成证书的能力,比如 webpack-dev-server (opens new window)、 UmiJS (opens new window),详细配置请参他们的官方文档。
# 录音
使用 MediaRecorder (opens new window) 实现录音功能,MediaRecorder (opens new window) 的构造函数需要一个 MediaStream (opens new window) 对象,这个对象可以是上面通过 navigator.mediaDevices.getUserMedia() 方法获取的,也可以通过 HTMLCanvasElement.captureStream() (opens new window) 方法和 HTMLMediaElement.captureStream() (opens new window) 方法获取。MediaRecorder (opens new window) 的构造函数还有一个可选的 options 对象,提供一些配置选项,比如媒体格式的 MIME 类型(mimeType)或者比特率(bitsPerSecond)。
new MediaRecorder(stream, options)
调用 MediaRecorder 的 start() 方法开始录音,当 MediaRecorder 将媒体数据传递给应用程序时,MediaRecorder 的 dataavailable 事件就被触发。这是一个 BlobEvent (opens new window) 类型的事件,它的 data 属性一个 Blob (opens new window) 对象,表示录制的媒体资源数据
调用 MediaRecorder 的 stop() 方法停止录音。调用 pause() 方法和 resume() 方法暂停和恢复录音。
静态方法 isTypeSupported() 判断浏览器是否支持某种 MIME 格式。
下面是录制音频的一个列子
let audioChunks = [];
let mediaRecorder
// 开始录音
function startRecording() {
  try {

    // 判断浏览器是否支持录音
    if (!navigator.mediaDevices) {
      alert('浏览器不支持录音!');
      return;
    }

    // 请求麦克风权限
    const stream = await navigator.mediaDevices.getUserMedia({
      audio: true,
    });

    // 动态检测支持的音频格式
    let audioType = '';
    if (MediaRecorder.isTypeSupported('audio/webm')) {
      audioType = 'audio/webm';
    } else if (MediaRecorder.isTypeSupported('audio/mp4')) {
      audioType = 'audio/mp4';
    } else {
      alert('浏览器不支持录音!');
      return;
    }

    // 清空 chunk
    audioChunks = []

    // 初始化 MediaRecorder
    mediaRecorder = new MediaRecorder(stream, { mimeType: audioType });
    mediaRecorder.start();

    // 收集录音数据
    mediaRecorder.addEventListener("dataavailable", (event) => {
      audioChunks.push(event.data);
    });

    // 录音结束时,生成 Blob
    mediaRecorder.addEventListener("stop", () => {
      // 将音频数据块转换为 Blob
      const audioBlob = new Blob(audioChunks, { type: audioType });
      // 生成音频 URL
      const audioUrl = URL.createObjectURL(audioBlob);
      // 设置音频 URL 为 <audio> 的播放源
      // audioElement.src = audioUrl;
    });
  } catch (error) {
    console.error("无法访问麦克风:", error);
  }
}

// 停止录音
function stopRecording() {
  if (mediaRecorder && mediaRecorder.state === "recording") {
    mediaRecorder.stop();
  }
}
2
3
4
5
6
7
8
9
10
11
12
13
14
15
16
17
18
19
20
21
22
23
24
25
26
27
28
29
30
31
32
33
34
35
36
37
38
39
40
41
42
43
44
45
46
47
48
49
50
51
52
53
54
55
56
57
58
59
60
# 设置采样率和单通道
录音之后进行语音识别,讯飞的语言识别功能要求采样率 16000 Hz 和单通道
# 比特率 VS 采样率
创建 MediaRecorder 时,有一个 audiobitspersecond (opens new window) 和 bitspersecond (opens new window) 选项,表示媒体组件的比特率(bitrate)。那比特率和采样率的区别是什么呢?它们是同一个东西吗?答案是否定的,它们不是同一个东西
- 比特率,表示每秒钟传输的比特数(bit),是衡量数据传输速度的指标,通常以每秒比特数(bps)、千比特每秒(kbps)来衡量。音频文件的比特率决定了其音质和文件大小,例如,一个 128 kbps 的 MP3 文件每秒包含 128,000 比特的音频数据。
- 采样率,这是每秒从模拟信号中捕获的样本数量,通常以千赫兹(kHz)为单位。音频采样率是指录音设备在一秒钟内对声音信号的采样次数,采样频率越高声音的还原就越真实越自然。换句话说:采样率越高,次数就越多,存的数据就越精细。
那要怎么修改采样率呢?MediaRecorder 并没有提供设置采样率的 API,这里就需要使用 Web Audio API (opens new window) 和 AudioContext (opens new window) 处理 MediaStream
# Web Audio API
Web Audio API (opens new window) 的一般工作流程如下:
- 创建一个
AudioContext(opens new window) 音频上下文 - 在音频上下文里,创建音频源(Sources),比如
createMediaStreamSource()(opens new window) 方法 - 创建音效节点(Effects),如混响,过滤器、音道合并等,比如
createChannelMerger()(opens new window) 方法 - 选择音频输出的目的地(Destination),比如设备扬声器
- 将音频源连接到音效节点,再将音效节点连接到目的地。

# AudioContext
AudioContext 代表了一个由音频模块链接而成的音频处理图,其中每个音频模块由 AudioNode (opens new window) 表示
new AudioContext(options)
AudioContext 的构造函数有一个可选的 options 对象,其中 samplerate (opens new window) 可以设置采样率
createMediaStreamSource() (opens new window) 方法从 MediaStream 创建一个 MediaStreamAudioSourceNode (opens new window) 对象,是一个从 stream 中获得其媒体的音频节点。
createMediaStreamDestination() (opens new window) 方法从创建一个 MediaStreamAudioDestinationNode (opens new window) 对象,代表音频目的地,它的 stream (opens new window) 属性是一个包含单个音频MediaStreamTrack (opens new window) 的 MediaStream,您可以使用此属性从音频图形中获取流。
BaseAudioContext (opens new window)(AudioContext 继承 BaseAudioContext)的 createChannelMerger() (opens new window) 方法创建了一个ChannelMergerNode (opens new window),它将多个音频流中的通道合并为单个音频流。
AudioNode (opens new window) 接口的 connect() (opens new window) 方法将节点的输出连接到另一个目标上。
实现采样率 16000 Hz 和单通道
function startRecording() {
  try {
    // 获取麦克风输入流
    const stream = await navigator.mediaDevices.getUserMedia({ audio: true });

    // 创建 AudioContext
    audioContext = new AudioContext({ sampleRate: 16000 }); // 设置目标采样率
    const source = audioContext.createMediaStreamSource(stream);

    // 创建单声道处理器
    const channelMerger = audioContext.createChannelMerger(1);

    // 连接音频流到单声道处理器
    source.connect(channelMerger);

    // 创建目标音频流
    mediaStreamDestination = audioContext.createMediaStreamDestination();
    channelMerger.connect(mediaStreamDestination);

    // 初始化 MediaRecorder
    mediaRecorder = new MediaRecorder(mediaStreamDestination.stream);
    mediaRecorder.start();
  } catch(error) {
    console.error("无法访问麦克风:", error);
  }
}
2
3
4
5
6
7
8
9
10
11
12
13
14
15
16
17
18
19
20
21
22
23
24
25
26
# References
- MediaStream Recording API (opens new window)
- Web Audio API (opens new window)
- Using the MediaStream Recording API (opens new window)
- Recording a media element (opens new window)
- Media Capture and Streams API (opens new window)
MediaDevices(opens new window)MediaRecorder(opens new window)MediaStream(opens new window)BaseAudioContext(opens new window)AudioContext(opens new window)AudioNode(opens new window)http-party/http-server(opens new window)FiloSottile/mkcert(opens new window)mdn/dom-examples(opens new window)